Are you ready to rock some stunning ombre dip nails? Look no further, because this article will guide you through the process step by step.
You’ll learn how to choose the perfect nail polish colors, prepare your nails for the dip, create the beautiful ombre effect, and add those finishing touches.
Plus, we’ll share tips to make your ombre dip nails last longer.
Get ready to express your creativity and set your nails free!
Key Takeaways
- Choose nail polish colors based on personal preferences and desired ombre effect.
- Prepare your nails properly before starting the manicure for a long-lasting result.
- Create the ombre dip effect by selecting two or more nail dip powder colors and blending them together.
- Finish the manicure with smoothing out imperfections, moisturizing nails and cuticles, and applying a protective top coat.
Choosing Your Nail Polish Colors
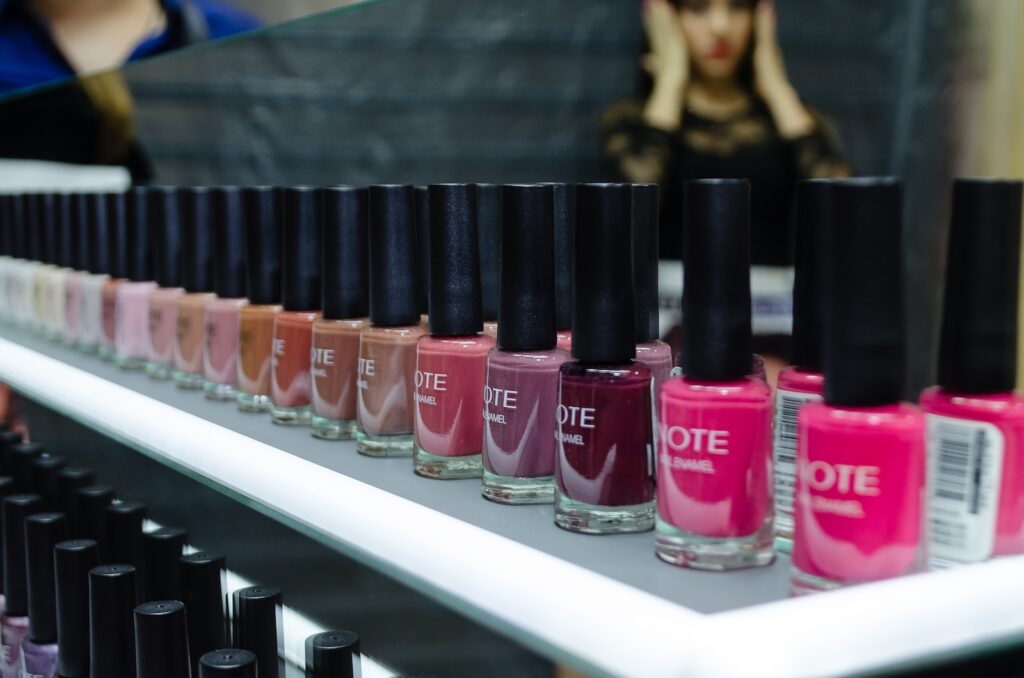
You should choose your nail polish colors based on your personal preferences and the desired ombre effect. When it comes to selecting the perfect shades, liberation is key. Embrace your individuality and break free from societal norms. Don’t be afraid to experiment with bold, vibrant colors that make a statement. If you desire a more subtle ombre effect, opt for softer, pastel hues. Remember, the choices you make should reflect your unique personality and style.
Consider your skin tone when selecting nail polish colors. Fair skin tones can rock light pinks, nude shades, and cool-toned pastels. Medium skin tones can go for warm, earthy shades like coral, peach, or bronze. Darker skin tones can pull off rich jewel tones, metallics, and deep blues or purples. However, these are just suggestions – feel free to break the rules and choose whatever colors make you feel empowered and confident.
Additionally, think about the occasion or mood you want to convey with your ombre dip nails. Are you going for a bold and edgy look for a night out? Or do you prefer a more romantic and feminine vibe? The possibilities are endless, so trust your instincts and let your imagination run wild. Remember, your nail polish colors are an expression of your freedom and liberation, so embrace the power of choice and create a look that’s uniquely you.

Preparing Your Nails
To properly prepare your nails for the ombre dip technique, gather all the necessary supplies and ensure your nails are clean and free of any polish or residue. Here are three essential steps to follow:
- Remove any existing nail polish: Start by using a non-acetone nail polish remover to completely remove any trace of old polish. This will provide a clean canvas for the ombre dip application.
- Shape and file your nails: Take a nail file and gently shape your nails to your desired length and shape. Whether you prefer a square, round, or almond shape, filing your nails will help create a polished look.
- Push back your cuticles: Use a cuticle pusher or an orangewood stick to gently push back your cuticles. This step will ensure that the dip powder adheres evenly to your nails, resulting in a smooth and professional finish.
By following these simple steps, you’ll be ready to achieve stunning ombre dip nails. Remember, preparing your nails is crucial for a long-lasting and flawless manicure.
Now that your nails are prepped, it’s time to dive into the exciting process of creating beautiful ombre nails.
Creating the Ombre Dip Effect
To achieve the ombre dip effect, begin by selecting two or more nail dip powder colors of your choice. This is where you can let your creativity shine and experiment with different combinations. Start by applying a base coat of the lightest color on all your nails. Make sure to cover the entire nail bed and let it dry completely.
Once the base coat is dry, it’s time to create the gradient effect. Take the second color and pour a small amount into a separate container. Dip the tip of your nail into the powder at a 45-degree angle, leaving the base color exposed. Gently tap off any excess powder and repeat this process on all your nails.
Next, repeat the same steps with the third color, but this time, only dip the tip of your nail halfway down. This will create a seamless transition from the second color to the third color. Again, tap off any excess powder and continue until all your nails are done.
To blend the colors together, use a soft brush to lightly dust off any excess powder and smooth out any harsh lines. Finish off with a top coat to seal in the design and add shine.
Now you have achieved the stunning ombre dip effect on your nails. Enjoy the freedom of expressing yourself through your unique and vibrant nail art!
What You Need
To do ombre dip nails, you will need to start by preparing your nails by trimming and filing them, then pushing back your cuticles and buffing the nail’s surface. Once your nails are prepped, you will need to apply a base coat and let it dry. After that, you will need to apply a color of your choice, from light to dark, and let it dry completely. After that, you will need to dip the nails into a powder of a darker color and let it sit for a few seconds. You can then use a silicone brush to brush off any excess powder and shape the ombre design.
Dipping Powder
You will need several colors of dipping powder. Choose colors that will look good together and will create the gradient effect. You can choose from a variety of colors and finishes, such as matte, gloss, and glitter.
Nail Prep Supplies
Before you start the ombre dip nails process, you should prepare your nails. You will need nail prep supplies, such as nail clippers, nail file, cuticle pusher, and cuticle oil.
Dip Tray and Applicator Brushes
You will also need a dip tray and applicator brushes. The dip tray will hold the dipping powder and the applicator brushes will be used to apply the powder.
Top and Base Coats
To ensure your ombre dip nails last long and look great, you will need top and base coats. The top coat will protect the design and the base coat will help your nails to adhere to the dip powder.
Step-by-Step Instructions

Ombre dip nails are a type of manicure that gives you a gradient color effect. To do ombre dip nails, start by applying a base coat to your nails. Once the base coat is dry, apply a light-colored powder dip to the tips of your nails. Then use a darker color powder dip and dip only the tips of your nails again. Once this is done, use a file to gradually blend the two colors together. Apply a sealer and let your nails dry. This will give you a beautiful ombre effect.
Prepare Your Nails
The first step is to prepare your nails. Begin by removing any existing polish. Then, use the clippers and file to trim and shape your nails. Push back the cuticles with the cuticle pusher and apply cuticle oil to nourish and moisturize your nails.
Apply the Base Coat
The next step is to apply the base coat. This will help the dip powder to adhere to your nails. Use the applicator brush to apply the base coat to your nails. Allow the base coat to dry completely before moving on to the next step.
Create the Ombre Effect
Now it’s time to create the ombre effect. Begin by selecting two or three colors of dip powder. You can choose colors that are similar or complementary. Place the dip powder in the dip tray and dip each nail into the dip powder. Start with the lightest color and gradually move to the darkest color. Allow each color to dry before moving on to the next.
Apply the Top Coat
Once you have achieved the desired ombre effect, it’s time to apply the top coat. The top coat will protect the design and ensure your ombre dip nails last longer. Apply the top coat with the applicator brush and allow it to dry completely.
Enjoy Your Ombre Dip Nails
Your ombre dip nails are now complete! Enjoy your unique and stylish look and show off your creativity and flair. With the right materials and a bit of practice, you can learn how to do ombre dip nails easily and quickly.
Troubleshooting Common Issues
Ombre dip nails are a popular nail treatment that can provide stunning results. However, like any other nail treatment, ombre dip nails may have their own set of common issues. To help troubleshoot any issues that may arise, it is important to make sure to follow the instructions for application carefully, use products of good quality, and practice good nail hygiene.
You should ensure that you are properly prepping the nails before applying the dip and that you are properly removing the dip after you are finished. If the dip is not applied correctly, it is likely to chip or peel off prematurely. If you encounter issues with the dip not adhering to the nails, it may be because the nails were not properly prepped or the dip was applied too thickly. It is also important to make sure to keep the nails dry for at least an hour after application, as this will help the dip to properly set.
If your ombre dip nails are looking dull, it may be because the topcoat was not applied correctly or was not applied at all. Adding a topcoat can help to add shine and durability to the nails. If you experience any other issues, be sure to contact a professional for help.
Not Enough Color
If you find that your ombre dip nails are not quite as vibrant as you would like, try dipping your nails into the dip powder for a longer period of time. This will help to create a more intense color.
Uneven Color
If the colors are not blending together as you would like, try using a different type of applicator brush. A fan brush is great for blending colors together and creating a more even look.
Color Bleeding
If the colors are bleeding into each other, try using a different type of basecoat. A thicker basecoat will help to prevent the colors from bleeding.
Too Much Color
If you find that your ombre dip nails have too much color, try wiping off the excess dip powder with a lint-free cloth. This will help to create a more subtle look.
Tips for Long-Lasting Ombre Dip Nails

Ombre dip nails are a fun and trendy way to get beautiful nails, but they don’t always last as long as other manicures. To make them last longer, you should make sure you file and buff your nails before applying the dip powder. Prep your nails with a base coat to help the powder adhere better and to protect your nails. You should seal the dip powder with a top coat to help it stay in place and last longer. With these tips, you can be sure to get longer lasting ombre dip nails!
Use a Quality Basecoat
Using a quality basecoat is essential for long-lasting ombre dip nails. Make sure to choose a basecoat that is specifically designed for dip powder nails.
Avoid Water
Ombre dip nails should be kept away from water as much as possible. Soaking your nails in water can cause the colors to fade and chip.
Reapply the Top Coat
Make sure to reapply the top coat every few days to keep your ombre dip nails looking fresh and vibrant.
Remove the Nails Carefully
When it is time to remove your ombre dip nails, make sure to do it carefully. Avoid picking or peeling off the nails, as this can cause damage to your natural nails.
Additional Tips
Here are some additional tips to help you get the perfect ombre dip nails:
Choose Complimentary Colors
When choosing colors for your ombre dip nails, try to choose colors that are complimentary. This will help to create a more cohesive look.
Experiment with Different Finishes
If you want to create a truly unique look, try experimenting with different finishes, such as glitter, metallic, and matte.
Practice Makes Perfect
As with any skill, practice makes perfect. Don’t be afraid to try different techniques and styles until you find the perfect look for you.
Conclusion
Ombre dip nails are a stylish and unique way to spruce up your nail look. With the right materials and a bit of practice, you can learn how to do ombre dip nails easily and quickly. Be sure to follow the steps outlined in this article and use the tips provided to get the most out of your ombre dip nails. With a bit of creativity and flair, you can create a look that is truly your own.