Are you tired of spending hours and money at the nail salon? Say goodbye to chipping polish and hello to Jamberry nails! With Jamberry nail wraps, you can easily achieve salon-quality nails in the comfort of your own home.
In this article, we will guide you through the simple steps of prepping, choosing, and applying Jamberry nail wraps. Get ready to rock beautiful, long-lasting nails without any restrictions.
Let’s dive in and unleash your creativity!
Key Takeaways
- Prepping your nails is essential for proper adhesion of Jamberry Nails. Trim, shape, and clean your nails before applying the wraps.
- Choose a Jamberry Nail Wrap that reflects your personal style and complements your skin tone. Consider the occasion or event you’ll be attending.
- When applying Jamberry Nail Wraps, clean your nails, warm up the wrap to make it pliable, and press it onto your nail starting from the cuticle.
- Seal the wrap around the edges, apply a top coat for protection and a glossy finish, and get creative with nail art or embellishments for a unique design.
Prepping Your Nails
You should start by trimming your nails to the desired length. Whether you prefer them short and chic or long and bold, it’s important to have them just the way you like. Use a nail clipper or file to achieve the perfect length that suits your style.
Next, you’ll want to shape your nails. Embrace the freedom to choose your desired shape, whether it’s square, round, or somewhere in between. Grab a nail file and gently shape the edges until they’re smooth and symmetrical.
Once your nails are trimmed and shaped to your liking, it’s time to give them a good clean. Freedom comes from starting with a blank canvas. Soak your nails in warm water and gently scrub them with a nail brush to remove any dirt or oils. This will ensure that your Jamberry Nails adhere properly and last longer.
Prepping your nails is an essential step towards achieving the beautiful, long-lasting Jamberry Nails you desire. Take the time to care for your nails and embrace the freedom to express yourself through your unique style.
Choosing the Right Jamberry Nail Wrap
When selecting your Jamberry Nail Wrap, make sure to consider your personal style and preferences. It’s important to choose a design that speaks to you and makes you feel confident. Here are four things to keep in mind when choosing the right Jamberry Nail Wrap:
- Design: Look for a design that reflects your personality. Whether you prefer bold and vibrant patterns or subtle and elegant designs, there’s a Jamberry Nail Wrap for every style. Don’t be afraid to experiment and try something new!
- Color: Consider the colors that you love to wear. Jamberry Nail Wraps come in a wide range of colors, from neutrals to bright and bold shades. Choose a color that complements your skin tone and matches your wardrobe.
- Pattern Size: Pay attention to the size of the pattern on the nail wrap. If you have shorter nails, you may want to opt for smaller patterns that won’t overwhelm your nails. On the other hand, if you have longer nails, you can go for larger patterns to make a statement.
- Occasion: Think about the occasion or event you’ll be attending. Jamberry Nail Wraps are versatile and can be customized to suit any occasion. Whether it’s a casual day at the office or a glamorous night out, there’s a Jamberry Nail Wrap that will match the vibe.
Applying Jamberry Nail Wraps
Sometimes, if you’re in a rush but still want fabulous nails, applying Jamberry Nail Wraps is the perfect solution. These nail wraps aren’t only easy to apply but also give you the freedom to express your style without the hassle of waiting for nail polish to dry.
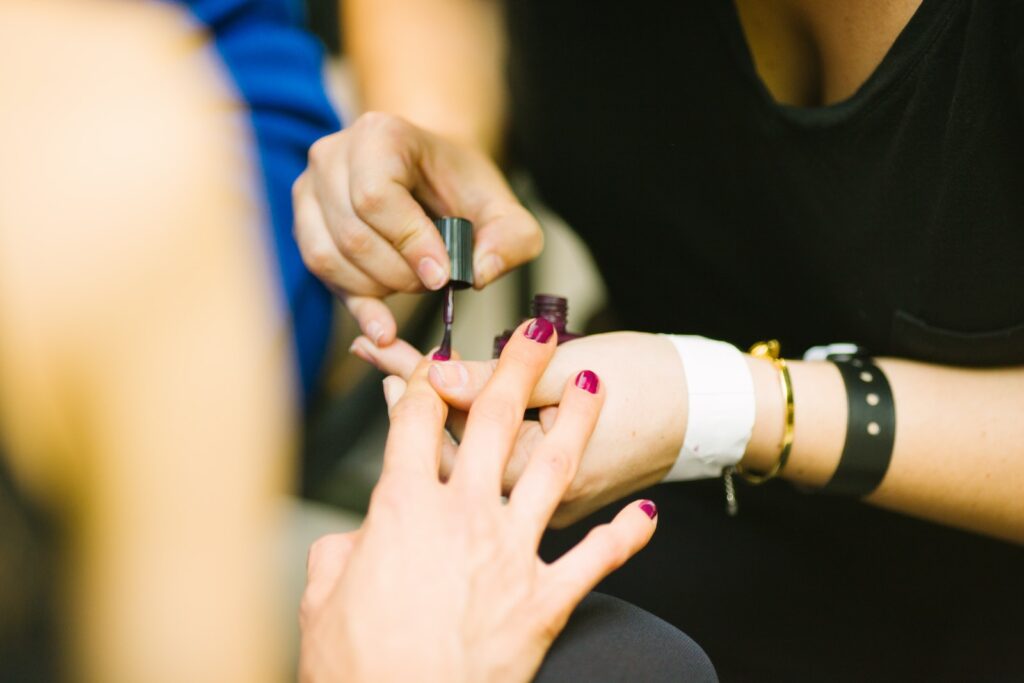
To apply Jamberry Nail Wraps, start by cleaning your nails with alcohol or nail polish remover to ensure they’re free from any oils or residue. Then, select the wrap that best matches your nail size and shape. Peel off the wrap and warm it up using a hairdryer or a Jamberry mini-heater. Once the wrap is pliable, press it onto your nail, starting from the cuticle and gently smoothing it out towards the tip.
Use a rubber cuticle pusher or a Jamberry application tool to seal the wrap around the edges of your nail. Finally, trim any excess wrap using nail scissors or a file and apply heat to activate the adhesive.
With Jamberry Nail Wraps, you can have the freedom to achieve beautiful nails in minutes, allowing you to get on with your day without worrying about smudged or chipped polish. So go ahead and try out Jamberry Nail Wraps for a quick and stylish nail makeover.

Sealing and Finishing Touches
To complete your Jamberry nail application, follow these three simple steps for sealing and adding finishing touches.
- Apply a top coat: After applying your Jamberry nail wraps, seal them in with a top coat. This won’t only protect the wraps but also give them a glossy and long-lasting finish. Choose a top coat that’s specifically formulated for nail wraps to ensure maximum durability.
- Smooth out any imperfections: If you notice any wrinkles or bumps on your nail wraps, don’t worry. Simply use a cuticle pusher or an orange stick to gently smooth out any imperfections. This will give your nails a flawless and professional look.
- Add nail art or embellishments: If you want to take your Jamberry nails to the next level, get creative with nail art or embellishments. You can use nail polish, glitter, or even nail stickers to create unique and eye-catching designs. Let your imagination run wild and express your individuality.
- Finish with a clear top coat: To protect your nail art and ensure it lasts, finish off your Jamberry nails with a clear top coat. This will seal in your design and add an extra layer of shine. Plus, it will help prevent chipping and extend the life of your beautiful Jamberry nails.
With these simple sealing and finishing touches, you can enjoy flawless and long-lasting Jamberry nails that showcase your personal style. So go ahead, have fun, and let your nails be a reflection of your freedom!
Long-Lasting Tips and Tricks
You can maximize the longevity of your Jamberry nails with these helpful tips and tricks.
First, make sure to properly prepare your nails before applying the nail wraps. This includes cleaning your nails with rubbing alcohol to remove any oils or residue that could interfere with the adhesion. Additionally, gently push back your cuticles to create a smooth surface for the wraps.
When applying the wraps, be sure to use firm pressure and smooth out any bubbles or wrinkles. This will ensure a tight seal and prevent the wraps from lifting. After applying the wraps, use a hairdryer on a low heat setting to activate the adhesive and help it bond to your nails.
To further enhance the longevity of your Jamberry nails, avoid exposing them to excessive heat or moisture. This means wearing gloves when doing dishes or cleaning, and using caution when using hot tools like curling irons or hair straighteners.
Finally, consider applying a top coat to your Jamberry nails. This will provide an extra layer of protection and help to seal and prolong the wear of the wraps.
With these tips and tricks, you can enjoy your Jamberry nails for days on end, while still having the freedom to do the activities you love.
Conclusion
In conclusion, applying Jamberry nail wraps is a simple and fun way to achieve beautiful, long-lasting nail art.
By prepping your nails, choosing the right wrap, and following the proper application techniques, you can have salon-quality nails in the comfort of your own home.
Remember to seal and add finishing touches for a professional look.
With these tips and tricks, your Jamberry nails will stay flawless for days.
Enjoy your gorgeous nails!